Tuesday, October 29, 2013

Apple Waffles

{I Think I Can} Apple Waffles, served with {I Think I Can} Cranapple Butter!

APPLE WAFFLES
1 1/4 c. pastry flour
1 T. sugar
1/4 t. salt
1/2 t. cinnamon
2 t. baking powder
2 eggs, separated
1 c. milk
1 3/4 c. finely chopped apples
6 T. melted butter or lard

Combine dry ingredients.  Beat egg yolks.  Add milk and combine with flour mixture.  Beat until smooth.  Add apples & butter.  Fold in stiffly beaten egg whites.

Serve with some {I Think I Can} CranApple Butter!

--------------------------------------------------------------------
I'll leave you with a piece of my living room...


--------------------------------------------------------------------

I linked this recipe up with the following Linky Parties: We Like To Learn As We Go, Chef in Training, , Dessert Now, Dinner Later!


Thanks For Stopping By!  
While You're Here, Why Don't You Leave A Comment?  
Tell Me What You Think!  
Make sure to PIN it for later too!

Cranapple Butter (Overnight in the Crockpot)

{I Think I Can}:  Cranapple Butter (Overnight in the Crockpot)

Here is another yummy & cute gift idea!
Well...I'll be keeping lots for myself too, 
because I LOVE to pile it on my breakfast!
Like my recipe for Apple Waffles.

{I Think I Can}:  Cranapple Butter (Overnight in the Crockpot)---COOKS WHILE YOU SLEEP!  Makes the house smell amazing!

I couldn't help myself, one day I looked outside and saw the ladder still by the apple tree, and the leaves on the ground...I thought what a BEAUTIFUL FALL PICTURE!  
So I took a bushel basket (aren't they soo cool!) out and took a few pics of this fall scene:

 {I Think I Can}:  I Love Bushel Baskets, fall scene

{I Think I Can}  I Love Bushel Baskets!

{I Think I Can}:  I Love Bushel Baskets, fall scene

Anyhow...Sorry I got distracted, but it's so
GOOD TO STOP AND SMELL THE ROSES sometimes! :)
I think it helps with stress relief to just slow down & notice God's creation & the beauty of it sometimes!

Now onto the photos of the process 
for makin' this nummy stuff & the recipe...

{I Think I Can}:  Cranapple Butter (Overnight in the Crockpot)---COOKS WHILE YOU SLEEP!  Makes the house smell amazing!
Place apples & juice into stockpot.  Cook down until apples are very tender.

{I Think I Can}:  Cranapple Butter (Overnight in the Crockpot)---COOKS WHILE YOU SLEEP!  Makes the house smell amazing!
As it cooks down, the apples take on the pink from the cranberry juice!  Look at that frothy bubbly stickiness!

{I Think I Can}:  Cranapple Butter (Overnight in the Crockpot)---COOKS WHILE YOU SLEEP!  Makes the house smell amazing!
 Place in batches into blender, juice and all.

{I Think I Can}:  Cranapple Butter (Overnight in the Crockpot)---COOKS WHILE YOU SLEEP!  Makes the house smell amazing!
I thought it was so neat looking I had to take 
a more up close picture!  
(Glass measuring cups work GREAT for scooping hot stuff, my plastic one just about got ruined with the heat---so I was excited to find a glass one at a garage sale!!!)

{I Think I Can}:  Cranapple Butter (Overnight in the Crockpot)---COOKS WHILE YOU SLEEP!  Makes the house smell amazing!
 Puree it up, making the "applesauce".

{I Think I Can}:  Cranapple Butter (Overnight in the Crockpot)---COOKS WHILE YOU SLEEP!  Makes the house smell amazing!
Combine dry ingredients.  Mix all ingredients together & pour into crockpot. 


{I Think I Can}:  Cranapple Butter (Overnight in the Crockpot)---COOKS WHILE YOU SLEEP!  Makes the house smell amazing!
Some of us can't pour & photograph simultaneously,
teehee, I missed a little bit!  Oops.

.This is the fun part.  

Turn the crockpot on LOW and....... 
GO TO BED!!  

When you wake up in the morning 
the whole house will smell DIVINE!!!!  

Another one of my favorite thing about fall, 
the smells of apples cooking! 

{I Think I Can}:  Cranapple Butter (Overnight in the Crockpot)---COOKS WHILE YOU SLEEP!  Makes the house smell amazing!
Notice how it gets darker as it cooks.  
Now turn to HIGH & cock the lid to let some steam escape, as it cooks 2-3 more hours, or until desired consistency

It's pretty forgiving on the times, so that's nice!  
I forgot to turn it off when it was "done", 
and it went another hour & it was totally fine! 
(I think I was getting my jars all ready & everything)

{I Think I Can}:  Cranapple Butter (Overnight in the Crockpot)---COOKS WHILE YOU SLEEP!  Makes the house smell amazing!
Place into jelly jars-or pints.


{I Think I Can}:  Cranapple Butter (Overnight in the Crockpot)---COOKS WHILE YOU SLEEP!  Makes the house smell amazing!
(Make sure you wipe off your messes before placing lids on)

{I Think I Can}:  Cranapple Butter (Overnight in the Crockpot)---COOKS WHILE YOU SLEEP!  Makes the house smell amazing!
Hot water bath for 10 min.  Mine made 14 jelly jars, which was EXACTLY one canner full.  It's always so nice when it works out like that! :)

CRANAPPLE BUTTER
(OVERNIGHT IN THE CROCKPOT)
24 apples peeled, cored, and sliced/chunked (the tarter the apple the better in my opinion)
2 qts 100% Cranberry juice
2 t. cinnamon
1/2 t. nutmeg
1-4 c. sugar 

Start this process in the evening:  Place apples & juice into stockpot.  Cook down until apples are very tender.  Place in batches into blender, juice and all.  Combine dry ingredients.  Mix all ingredients together & pour into crockpot.  Cook on LOW for 10 hours (or overnight).  Then (in the morning by now) turn to HIGH & cock the lid to let some steam escape.  Cook 2-3 more hours, or until desired consistency. It's pretty forgiving on the times, so that's nice!  Place into jelly jars-or pints, & hot water bath for 10 min.  Makes approx 14 jelly jars. (One canner load!)

I prefer mine pretty tart so I only add 1 cup of sugar.  I suggest adding less to start, and tasting it in the morning & adding more if needed @ that point.

{I Think I Can}:  Cranapple Butter (Overnight in the Crockpot)---COOKS WHILE YOU SLEEP!  Makes the house smell amazing!

--------------------------------------------------------------------

USES:  pancakes, waffles, muffins, bread (anything apple too of course), the other night I put it on a pork loin! YUM! 

--------------------------------------------------------------------

To view handcrafted items to purchase 
as gifts for those special people in your life, 
or special occasions...
VISIT my {RLEE} shop @: facebook.com/byrlee


--------------------------------------------------------------------
I linked this recipe up with the following Linky Parties: 
We Like To Learn As We Go
Child at Heart Blog,
What's Cookin Love?,
Making the World Cuter


Thanks For Stopping By!  
While You're Here, Why Don't You Leave A Comment?  
Tell Me What You Think!  
Make sure to PIN it for later too!

Thursday, October 24, 2013

Apple Crisp Topping

Here's the recipe for the Apple Crisp Topping, if you want to give the Canned Apple Pie Filling to someone as a gift.

{I Think I Can} Canned Apple Pie Filling
{Pretty way to wrap the jar if giving as a gift}

APPLE CRISP TOPPING

1 c. quick oats
1 c. brown sugar
1 c. flour
2 t. cinnamon
1/3 t. baking powder
1/4 t. baking soda

Place into a zip lock bag.  Before you do though, make sure and write the *instructions on the outside of the bag with a permanent marker.

*Instructions:

  • Place apple pie filling into 9x13 pan.
  • Combine 2/3 c. cold butter with the ingredients in this bag until resembles coarse crumbs.
  • Place on top of the apple pie filling.
  • Bake, uncovered, at 350 for 40 minutes.
This recipe is for a 1 quart jar of the Apple Pie Filling

                        {I Think I Can} Apple Crisp

Here's how my photo session went, trying to get a picture of this whole zip lock bag thing:

{I Think I Can} Apple Crisp Topping
"But mom, you can't mention my name in a post, with out me being a part of the pictures!"

{I Think I Can} Apple Crisp Topping
"I just wanna play with it real quick, just quick I promise, it'll be like everything else, I'll get tired of it in 30 seconds!"

{I Think I Can} Apple Crisp Topping
"But it's sooo cool mom, way cooler than any of my toys
because it's not a real TOY!"

{I Think I Can} Apple Crisp Topping

SIGH! 
Finally...here we go! 
What we've been waiting for, 
but little fingers and hands and bodies 
kept getting in the way!
Makes life interesting, & worth living for!
-------------------------------------------------------------------


Thanks For Stopping By!  
While You're Here, Why Don't You Leave A Comment?  
Tell Me What You Think!  
Make sure to PIN it for later too!

Canned Apple Pie Filling

What else "CAN" I do 
with all my apples this year?

{I Think I Can} Canned Apple Pie Filling


When we had Ryleigh a dear friend brought 
us a meal, and for the dessert: 
it was a quart jar of 
Canned Apple Pie Filling, 
along with a zip lock bag with the 

What a THOUGHTFUL & neat idea I thought.  
So I tucked it away in the files of my brain until this year-when we have an OVER 
abundance of apples.  Then I got out the recipe, and canned up a storm.

I think I made about 17 quarts or so.

{I Think I Can} Canned Apple Pie Filling
There's just something so NEAT about a 
BUSHEL basket FULL of APPLES!!
Maybe it's just me that thinks so????

{I Think I Can} Canned Apple Pie Filling
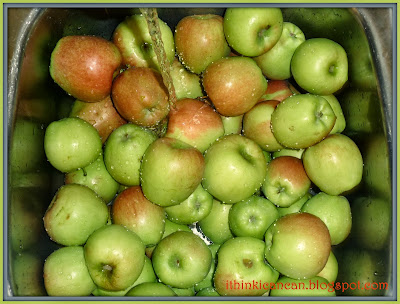
Start by washing all them apples.

{I Think I Can} Canned Apple Pie Filling
Look at them beauties!

{I Think I Can} Canned Apple Pie Filling
Then peel, core, and slice your apples.

If you don't own an Apple Peeler Corer Slicer
they are soooo handy.  
I use it for making dried apples in our food dehydrator too.

{I Think I Can} Canned Apple Pie Filling
Lookin' good!

{I Think I Can} Canned Apple Pie Filling
Wow, don't they just look PERFECT!  

That's one advantage of that lil gadget too, 
they are all about the exact same shape/size!
Making a nice lookin' jar of pie filling!

{I Think I Can} Canned Apple Pie Filling
I just think it's really neat how all the peelings just 
come off like little noodles or something!
If it works right, ALL the peel off ONE apple 
is in ONE long string...so it's really not that messy!

{I Think I Can} Canned Apple Pie Filling
Now combine the dry ingredients: 
(sugar, salt, brown sugar, cinnamon, & instant clear gel)

For those of you who live in IL, the Country Cupboard in Fairbury 
carries the instant clear gel.  Otherwise I know like Beachy's in Arthur, IL 
carries it too...or probably any bulk food store would.

Combine the water & lemon juice.

{I Think I Can} Canned Apple Pie Filling
Slowly add a little at a time to the dry ingredients, 
until well combined.

{I Think I Can} Canned Apple Pie Filling
Pour over the apples and carefully mix until well coated.

{I Think I Can} Canned Apple Pie Filling
Now all you need to do is place into jars & can.

CANNED APPLE PIE FILLING
31 cups apples peeled, cored, and sliced
10.5 cups water
10 tsp lemon juice
Cinnamon to your taste
4.5 cups brown sugar
4 cups sugar
1 tsp salt
2.25 cups instant clear gel

Mix dry ingredients together. Combine water & lemon juice. In small amounts mix wet ingredients with the dry; beating rapidly each time to prevent lumping. Beat until well combined. Add it to the apples. *Fill quart jars just to bottom of neck. Process 20 minutes in water bath or just bring to 5# pressure in pressure canner. Makes approximately 10-11 quarts.

{I Think I Can} Canned Apple Pie Filling
--------------------------------------------------------------------
Look at them all done!  
I think it makes such a 
pretty jar 
to give as gifts!!!
--------------------------------------------------------------------
Lessons learned:  
-DO NOT OVERFILL JARS!*  Or else they either won't seal, or the seal will break/pop with little contact.
-When delivering to someone in a brown paper sack, beware/the handle may break, and the bag go flying to the ground, and create a mess of broken glass and sticky apple pie filling all over the inside of the bag & all the other food you made for them.  Sad day! Oh well, life could be worse!
-Make sure you choose an apple that is a cooking apple.  Otherwise the apples may not cook down properly.


Thanks For Stopping By!  
While You're Here, Why Don't You Leave A Comment?  
Tell Me What You Think!  
Make sure to PIN it for later too!


Child At Heart
 

Friday, October 18, 2013

Canned V8~Tomato Juice

{I Think I Can} Canned V8-Tomato Juice

Yes folks! 

I'm STILL harvesting tomatoes...
They just keep comin' and comin'...
"the pot that won't run dry..."

I keep waiting for my husband to pull my plants, 
but until that happens I hate to see them go to waste, 
so I keep coming up with things to do with them :)  
Hopefully they'll be out soon, 
as I'm starting to run low on IDEAS!

Now How is This for BEAUTIFUL:

{I Think I Can} V-8 Tomato Juice

 V-8 tomato juice 

 I just LOVE it's RICH DEEP RED color!
You know what makes it that color?
.BEETS.
NOW, now--DON'T get turned off quite yet!
I. Don't. Like. Beets. Either.
-For Real-
But you can NOT taste them, it just really 
adds a beautiful color to the finished product!
Plus I'm sure some added 
vitamins & minerals-whatever beets provide!
So, just give it a chance :)

Alrighty: now for the recipe...
V-8/ TOMATO JUICE
You will need:
-1/2 bushel of tomatoes, washed & halved or quartered (or 26#, or 2 gallons already juiced tomatoes)
-1 bunch celery, cut into chunks
-1 bunch carrots, ends removed, and chunked
-leftover veggies from your garden, or go buy some if you want.
(I used:)
-4-5 peppers (all colors), seeded and chunked
-several onions, in large chunks
-several garlic cloves, minced
-handful of beets, peeled and chunked
Now this is what you do:

{I Think I Can} V-8 Tomato Juice
Throw all the veggies (except the beets) into a big pot.  
Add some water to help get the steaming going.  
You want the veggies to cook down to pretty mushy.  

Place a lid on the pot.

{I Think I Can} V-8 Tomato Juice
Aren't those vibrant colors just screaming: 
HEALTHY, HEALTHY, HEALTHY!? 

{I Think I Can} V-8 Tomato Juice
Place the beets into a separate pot along with a little water, and cook them until pretty tender. 
--watch so the water doesn't all boil out and it starts to burn on, 
not speakin' from experience or anything :) --

{I Think I Can} V-8 Tomato Juice
In another pot, cook the tomatoes down. 
(leave the skins on)  
Add a little water if you need to.

Then run them through the squeezo, saving the juice!

{I Think I Can} V-8 Tomato Juice
Now once the beets are all done cooking, 
add them-juice and all, to the blender & puree.

Do the same with the other veggies.

{I Think I Can} V-8 Tomato Juice
Then mix the two purees together.
Isn't that soooo pretty?

Once the tomato juice is ready.  
Place all ingredients into one big bowl & stir it up good.

Now all you have left to do is hot water bath them.  
Pints & quarts both take 35 minutes.

Mine made 6 quarts & 19 pints w/ a tad left over.

Uses:  in any recipe that calls for tomato juice or V-8 juice, such as chili, casseroles, stews, soups, 
meats in the crock pot...
You can also drink it like V-8 juice if you are that type of person.  I don't particularly enjoy that sort of a thing myself.  But I know lots of people do! 

~HAPPY COOKING & DRINKING~
Rhonda


{I Think I Can} V-8 Tomato Juice


Thanks For Stopping By!  
While You're Here, Why Don't You Leave A Comment?  
Tell Me What You Think!  
Make sure to PIN it for later too!


Linking this recipe up with the following Linky Parties:  Creations by Kara,"Showcase Your Talent", on Whats cooking, Love?, Dessert Now, Dinner Later!